TronMesh Wallet: user guide
This guide describes the web version of the wallet.
The essentials in a minute #
- TronMesh Wallet is a wallet for USDT on the TRON network (the TRC-20 standard).
- To send USDT, you need no TRX, no energy and no bandwidth — only USDT. We provide the network resources, and the fee is in USDT.
- Before sending, the wallet shows the exact fee and the total amount that will be deducted. Nothing is deducted until you tap “Send”.
- Your keys are stored only with you. If you lose your seed phrase, nobody can recover the wallet.
1. What this wallet is and why you don’t need TRX #
What it is. TronMesh Wallet is a simple wallet for USDT (TRC-20) only. You can receive, send, and view your history. There are no swaps, no fiat, and no other networks.
The wallet is “non-custodial”. This means the key to your money is held only by you. It is created on your device and stored encrypted in your browser. We don’t have it and never will. No sign-up, email, or phone number is needed.
Why you don’t need TRX. On the TRON network, any USDT transfer is usually paid for with network resources. You get them by holding TRX in your account. TronMesh Wallet works differently:
- You enter the address and the amount.
- The wallet shows the fee in USDT.
- After you confirm, we prepare the network resources for you.
- The fee is deducted in USDT as a separate small transfer, and the main transfer goes to the recipient.
About resources, in one line: Energy is the network resource spent on a token transfer; Bandwidth is the resource for transmitting the transaction itself. You don’t need to top them up: the wallet gets the network resources for the transfer by itself, and the fee is charged in USDT.
2. Create a wallet, import one, multiple wallets #
2.1 Create a new wallet #
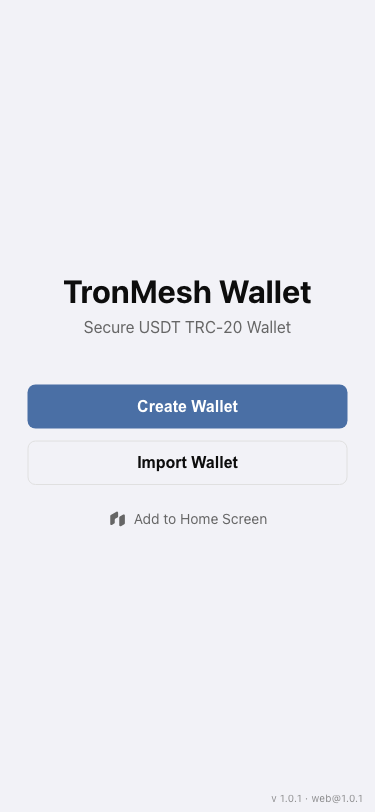
Open the wallet. On the start screen (“TronMesh Wallet”, “Secure USDT TRC-20 Wallet”):
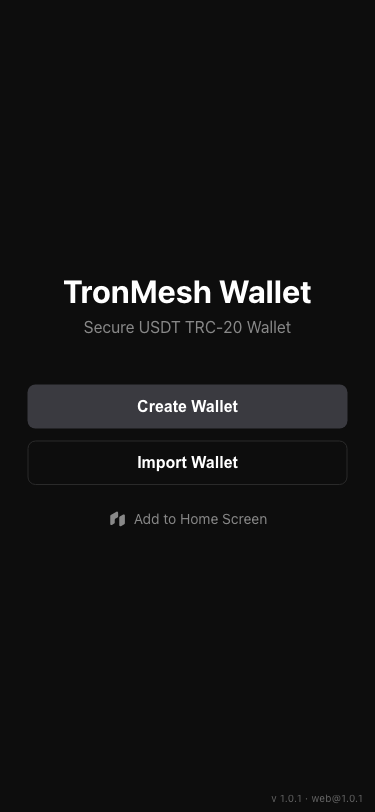
- Tap “Create Wallet”.
- The “Back Up Your Seed Phrase” screen opens. Make sure nobody is watching your screen, and tap “Tap to Reveal”.
- Write down the 12 words in order on paper. The numbered words are shown in two columns.
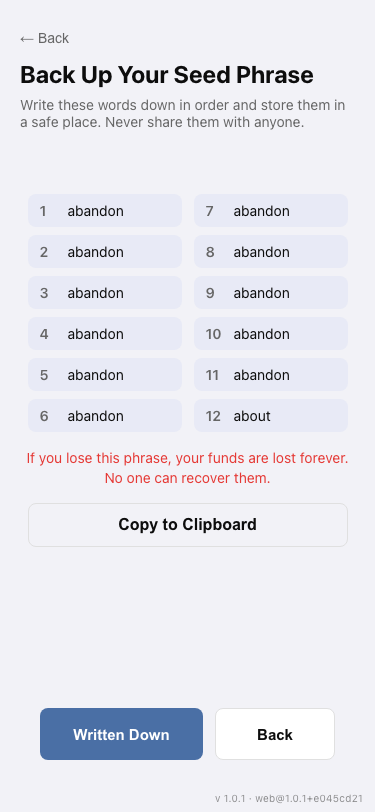
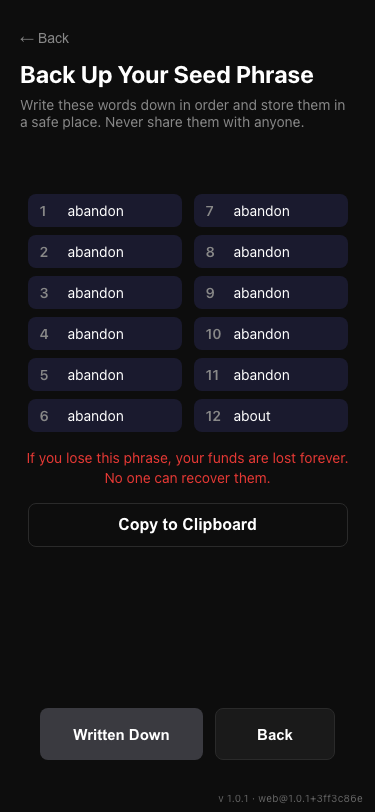
- Tap “Written Down”. The button becomes active only after the words have been shown.
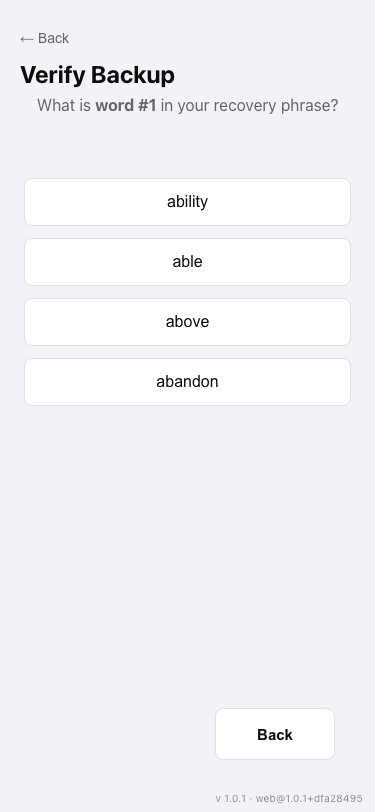
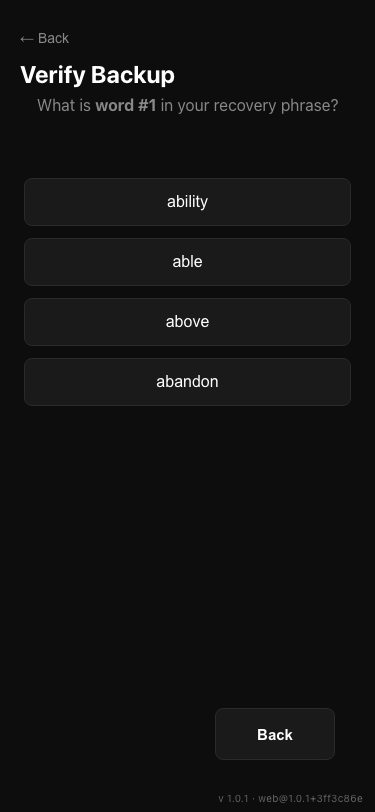
- Check. The app asks for one word by its number and shows four options. Tap the right word. You can get it wrong as many times as you like: the app will just ask you to try again.
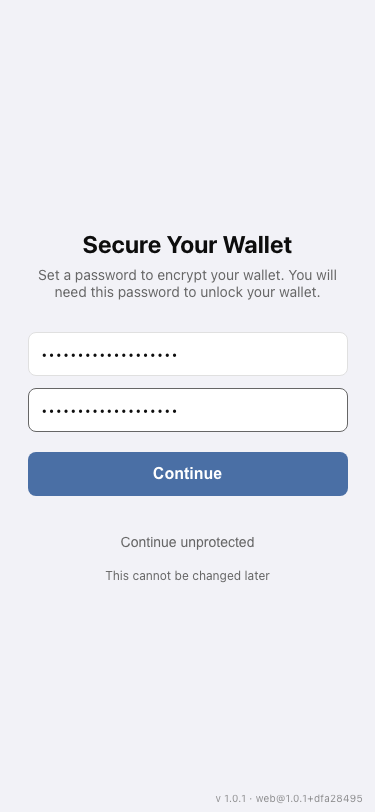
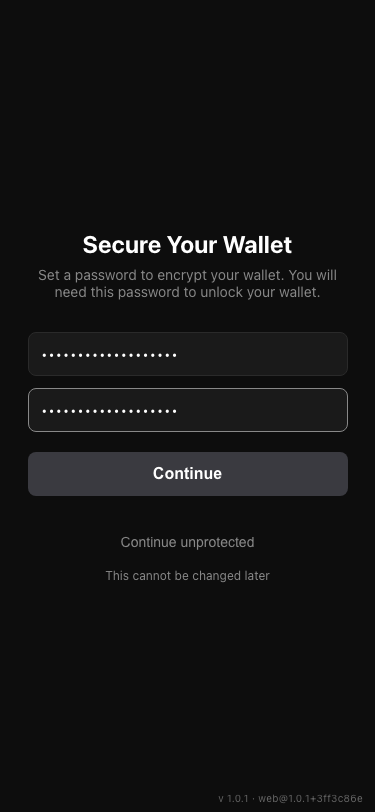
- The “Secure Your Wallet” screen: choose a password (at least 8 characters), repeat it in the “Confirm password” field, and tap “Continue”. If your device supports biometrics, the screen also has a “Use biometrics instead” link: it sets up biometrics only, without a password.
- After the password, if your browser supports fingerprint or face sign-in, you will be asked “Unlock With Biometrics?”. Tap “Enable Biometric” to add biometrics to the password, or “No thanks” to keep the password only.
- The “Balance” main screen opens.
Protection is required. You cannot continue without it: the wallet is always protected by a password or by biometrics. Biometrics count only if the browser gets the encryption key from the device’s biometric authenticator (WebAuthn PRF); if not, set a password. If a biometrics-only setup fails, the app says “Biometrics are not available on this device. Set a password instead.” and the second button “Set a password instead” returns to the password screen.
2.2 Import an existing wallet #
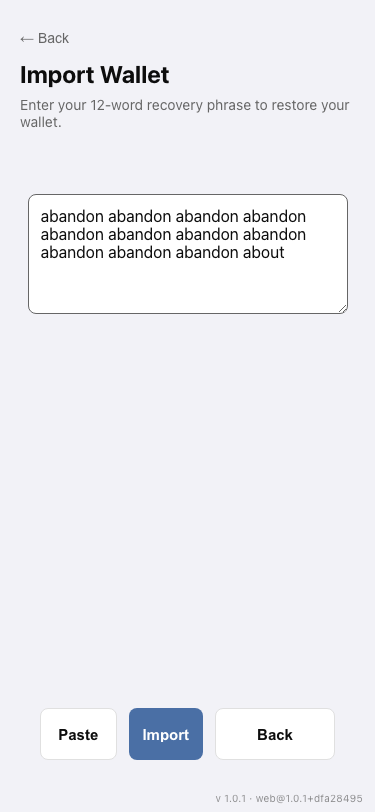
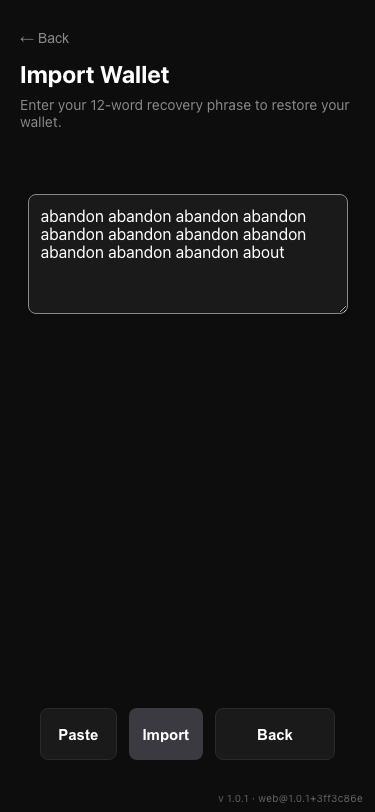
This works if you already have a seed phrase from a wallet on the TRON network.
- On the start screen, tap “Import Wallet”.
- Enter the seed phrase in the field or tap “Paste”.
- Tap “Import”.
- After that, the protection screens are the same as in section 2.1 (steps 6–8).
What matters:
- Only a seed phrase is supported: 12 words (a 24-word phrase is also accepted). Importing by private key is not available.
- The words must be in English (the standard BIP-39 list). The app removes extra spaces, letter case, punctuation, and word numbers (“1. word”) by itself.
- Only one address — the first one — is taken from the phrase (the standard TRON path
m/44'/195'/0'/0/0). If in another wallet you used the second or third address from the same phrase, it will not appear here. - If the phrase is wrong, the app shows an error: “Invalid seed phrase. Check spelling and word count.”
2.3 Multiple wallets #
Add another wallet.
- On Home, tap the wallet name ▾ to open “Wallets”, then tap “Add wallet”.
- On “Add wallet”, choose “Create new” for a new recovery phrase (continue with steps 2–5 in 2.1), or “Import” if you already have one (see 2.2).
- The new wallet becomes active right away.
- All wallets open with the same password or biometrics. There is no separate password for an added wallet.
Switch. On the “Wallets” screen, tap the card of the wallet you want. The balance of each wallet is also shown there. You can also tap the wallet name at the top of the main screen.
Rename. Open ⋯ on the wallet’s row, choose “Rename”, enter a name and tap “Save”. Default names: “Wallet”, “Wallet 2”, and so on.
Remove a wallet from the device. Open ⋯ on the wallet’s row, choose “Delete”, then “Confirm delete”. The money stays on the network. The wallet can only be restored with the seed phrase. If you remove the last wallet, the app returns to the start screen.
Reorder. With several wallets, tap “Reorder”. Drag the handle or use the arrow buttons, then tap “Done”. “Cancel” discards the changes.
Telegram notifications for a wallet: see section 8.1.
2.4 Move wallets to another browser #
Each place where you open the wallet keeps its own storage: Safari, the app on the Home Screen and Telegram’s built-in browser do not see each other’s wallets. The transfer code moves all wallets at once, with their names and order.
In the place where the wallets are now:
- Gear → “Transfer wallets”.
- Choose a password for this transfer only and enter it twice (at least 8 characters), then tap “Create code”.
- Confirm it is you with the wallet password or biometrics.
- Tap “Copy code”. If this phone is connected to our Telegram bot (section 8.1), you can also tap “Send to myself in Telegram”. For another phone or computer there is “Show QR for another device”.
In the new place:
- On the start screen tap “Receive wallets from another browser”; if this place already has wallets: gear → “Receive transfer”.
- Tap “Paste code” (on iPhone also tap the system “Paste” bubble), or “Scan QR” for a QR from another device. The code folds into one line with “Change” next to it, and the next screen asks only for the transfer password (the eye icon shows what you type); tap “Receive wallets” right under it.
- In an empty browser you then protect the wallets as in section 2.1 (steps 6–8). Where wallets already exist, wallets with the same address are skipped and the rest are added after them.
One phone. You cannot scan a QR on your own screen, so copy and paste: copy the code, switch to the other place (for example, from Safari to the app on the Home Screen), open “Receive transfer” and tap “Paste code”. If the browser does not allow the paste button, it says: “The browser did not allow pasting. Long-press the field below and choose “Paste”.”
Send to yourself in Telegram. With the bot connected, “Send to myself in Telegram” sends the code to your own chat with our bot, and only to the chat already connected on this device. The message says the code works for 10 minutes in the wallet. In Telegram, tap the code to copy it and paste it in the wallet, or tap “Open in TronMesh Wallet”: the wallet opens “Receive transfer” with the code filled in and asks for the transfer password. The password is never sent. If the button opens the page inside Telegram while your wallet lives in Safari, Chrome or on the Home Screen, copy the code there and paste it in your wallet.
What matters:
- The wallet accepts the code for 10 minutes. This limit is in the wallet only: anyone who keeps a copy of the code and knows the password can open it later, at any time, and see the seed phrases. Never send the code and the password together, and choose a strong password.
- The code is encrypted on your device. Copied or shown as a QR, it goes straight from one place to the other. Sent to yourself in Telegram, the encrypted code passes through our server and Telegram, and stays in your chat until you delete it; our server does not keep it, and nobody gets the password. Delete the message after the transfer.
- In Telegram’s built-in browser the wallet first warns: “Telegram may clear the storage of its built-in browser, and the wallets will disappear from here. You can bring them back with the recovery phrases or by transferring the wallets from another browser.”
- The seed phrase remains the way to restore a wallet in any case (section 3.1).
- If something is wrong, the wallet says so: “The code has expired. Create a new one in the other browser.”, “Wrong transfer password.”, “The code is damaged or incomplete. Copy it again in full.”
2.5 Wallets created earlier without a password #
Earlier versions allowed saving a wallet without a password. After the next open or unlock, such a wallet (including one opened in Telegram) shows a mandatory screen “Protect your wallet”. The text on it: “This wallet is saved in this browser without a password. Set a password or turn on biometrics to keep using it. Your wallets, funds and recovery phrase stay the same.”
- Choose a password (at least 8 characters), repeat it and tap “Protect wallet”. If your device supports biometrics, you can tap “Use biometrics instead” instead.
- Until protection is set, nothing else in the app opens, and the step cannot be skipped.
Your wallets, funds and recovery phrase stay the same. The old copy of the key kept on the device without protection is deleted after re-encryption. If the wallet could not be protected, nothing changes: the app says “Could not protect the wallet. Nothing was changed. Try again.” and you can try again.
3. Backup and security #
3.1 Seed phrase: the main rule #
The seed phrase (in the app also called: “Recovery phrase”) is 12 words that fully replace the wallet.
- We cannot recover your wallet. We don’t have your key. The app says it plainly: “If you lose this phrase, your funds are lost forever. No one can recover them.”
- Never show the phrase to anyone or send it. Anyone who knows the phrase can take all the money.
- Write it on paper and keep it in a safe place. Don’t take a photo of it and don’t store it in notes or in the cloud.
- There is a “Copy to Clipboard” button, but paper is safer. After 60 seconds the app tries to clear the clipboard if your phrase is still in it.
Show the phrase again. You can do this at any time:
- In “Wallets”, open ⋯ on the wallet’s row and choose “Recovery phrase”. Check the wallet name before authenticating.
- Read the warning (“Keep it secret”) and tap “Continue”.
- Confirm it’s you: enter your password or use “Confirm with Biometric”. Then tap “Show”.
- After authentication, you can write the words down or tap “Copy recovery phrase”. Paste into a password manager and clear the clipboard. Do not keep the phrase in notes or screenshots. The phrase hides when you leave, switch tabs or lock the app.
3.2 Protection on the device #
- The password encrypts the wallet in your browser. We don’t know the password and can’t reset it. If you forgot the password, what remains is “Forget Wallet” and signing in again with the seed phrase (section 2.2).
- Auto-lock. The wallet locks after 15 minutes of inactivity. To get in, you need the password (“Unlock”) or “Unlock with Biometric”. To lock it manually: gear → “Lock application”.
- “Forget Wallet” (gear, the “Wallet” section) removes the wallet from this browser only. The money stays on the network. You will need the seed phrase to get it back. If you have several wallets, this item is hidden: use “Wallets” → ⋯ → “Delete”.
3.3 Protection from scammers #
- The only place in the app where you enter the phrase is the “Import Wallet” screen. If someone (in a chat, an email, “support”) asks for the phrase anywhere else, it is a scam.
- Open the wallet only from a bookmark you saved yourself, not from links in emails or messengers.
- Before sending, check the recipient’s address in full, not just the beginning and the end. The wallet checks that the address looks like a TRON address, but it cannot check that it belongs to the person you mean or that the recipient accepts USDT TRC-20.
- After you tap “Send”, the transfer cannot be cancelled in the app.
4. Main screen and balance #
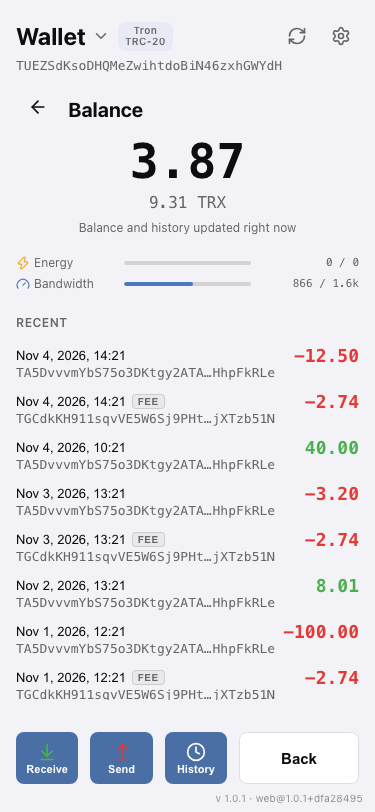
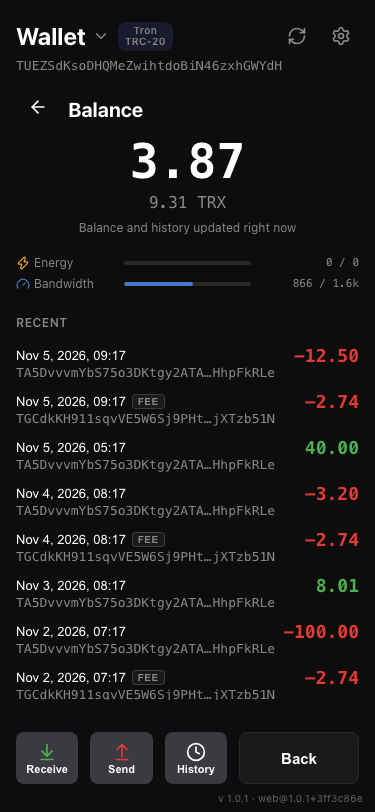
- At the top: the wallet name (tap to switch), the network, and the address. Tap the address to copy it.
- In large type — the USDT balance. Below it in small type — TRX. USDT is shown with two decimal places, TRX with six; the separators depend on the interface language.
- The “Recent” block shows the latest operations (up to 10).
- The buttons “Receive”, “Send”, “History”.
- The balance and history refresh by themselves about once a minute. To force it: the refresh icon (circular arrows) in the top right corner. Under the balance you can see when the data was last updated: “Balance and history updated right now” / “Balance and history updated …s ago” / “Balance and history updated …m ago”.
5. Receive USDT #
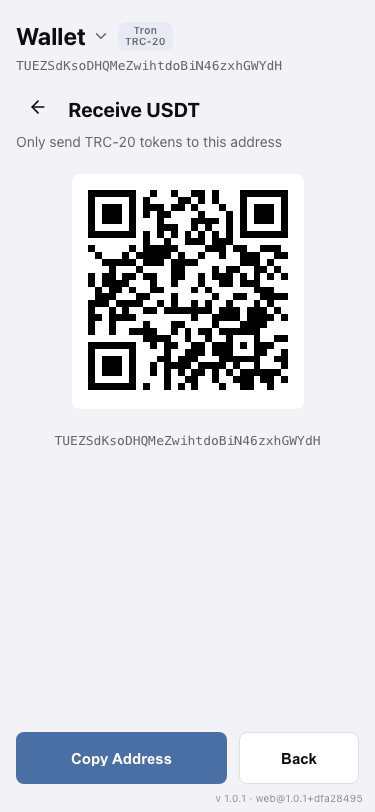
- On the main screen, tap “Receive”. The “Receive USDT” screen opens: a QR code, the address, and a copy button.
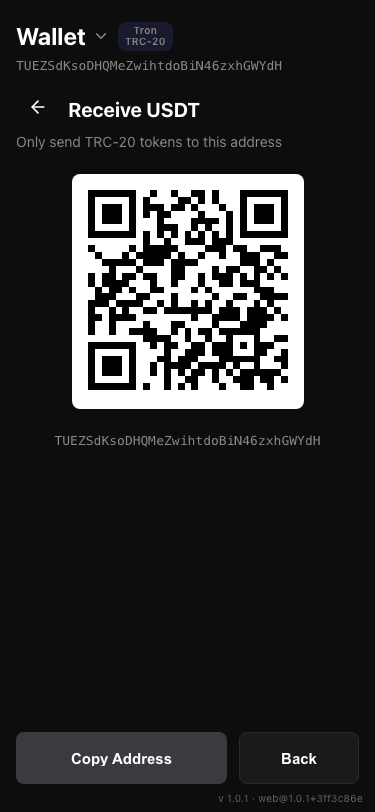
- Show the sender the QR code or give them the address. The address is a long string that starts with the letter T, for example
TXXXXXXXXXXXXXXXXXXXXXXXXXXXXXXXXX(this is an example, not a real address). - To copy the address, tap “Copy Address”. For a second, the button changes to “Copied!”.
- Ask the sender to choose USDT on the TRON network (TRC-20). The screen says: “Only send TRC-20 tokens to this address”. Money sent over a different network may be lost.
- Go back to the main screen: the balance and history update by themselves (see section 4).
5.1 Request payment by link #
An invoice is a link to a payment page with the amount and your address. Send it in any messenger, by email or SMS. In Telegram you can also create invoices with the bot (see 8.2).
- On the wallet home screen, tap “Invoice”. You can also open “Receive USDT” and tap “Request payment”.
- Enter the amount: above zero, with at most 2 decimal places. The description is optional, up to 80 characters; the payer sees it on the page.
- Tap “Create link”. The wallet signs the invoice with this wallet’s key: this proves that the address is yours. Nothing leaves your balance and there is no fee.
- Tap “Share”: the share menu of your phone opens with the link and the text “Pay 25 USDT (TRON) — description”; choose any app. If the browser has no share menu, the link is copied instead. “Copy link” always copies the link.
When the form offers “I'll pay the fee”, you can turn it on before creating the link. When the payer opens it in TronMesh Wallet, the total debit is the requested amount and the fee is deducted from what you receive. A different wallet should send the full amount. The public invoice page does not show this split; the recipient sees the amount received and the fee deducted in the Telegram bot payment notice and in the wallet under “My invoices”.
The payer opens the page and pays from any TRON wallet. It is the same payment page as for a Telegram invoice (see 8.2), and the invoice works the same way: valid for 7 days, only one open invoice for the same address and amount (Telegram invoices included), and the status becomes “Paid” by itself when exactly one confirmed transfer of exactly that amount arrives.
“My invoices”. Below the form you see the invoices created in this browser and their status: “Payment pending”, “Payment found · needs review”, “Paid”, “Cancelled” or “Expired”. An open invoice can be cancelled with “Cancel invoice”: the page then shows “Cancelled”. The list lives in this browser: another browser, or this one after its site data is cleared, shows it empty, but the payment pages keep working.
If more than one transfer of exactly this amount arrived, the invoice shows “Payment found · needs review” with the list of those transfers and a link to each in the explorer. Tap “Use transfer” next to the transfer that pays this invoice: the service checks it again and, within a few minutes, marks the invoice paid. A transfer that already paid another invoice cannot be used twice. You can also cancel the invoice instead.
Limits: up to 20 invoices per hour; USDT on TRON (TRC-20) only.
6. Send USDT #
6.1 Steps #
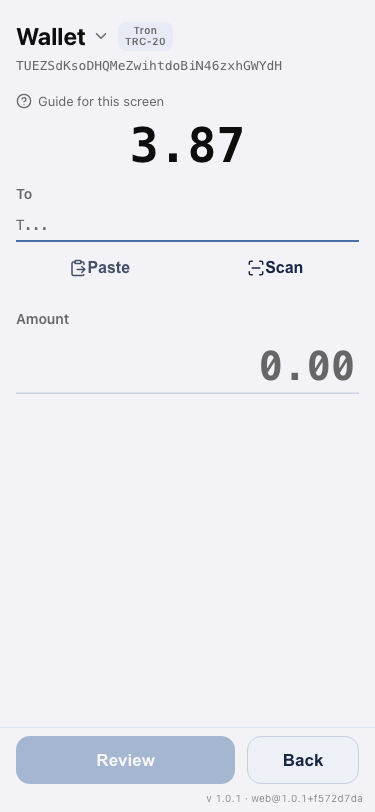
- On the main screen, tap “Send”. “Send USDT” opens.
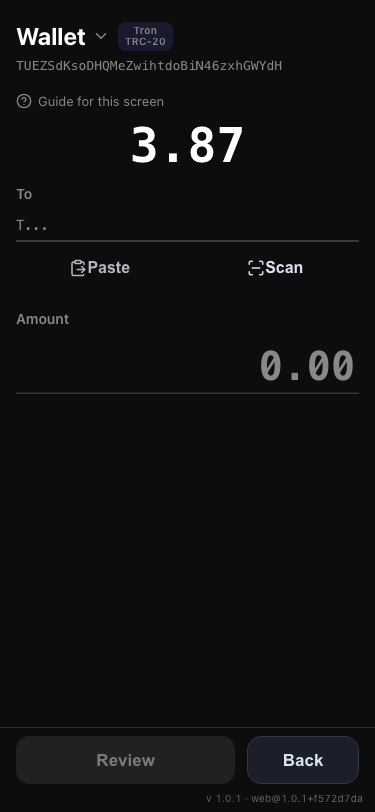
- In the “Recipient” field, enter the address. Faster: “Paste” (from the clipboard) or “Scan” (the recipient’s QR code; the browser will ask for camera access). If the clipboard or QR code has no TRON address, the app will tell you.
- A mark appears next to the field: “Checking...”, then “Activated” or “Not activated”. Or an error: “Invalid address”, “Own address” (you can’t send to yourself). For what “Activated” and “Not activated” mean, see section 9.3.
- In the “Amount” field, enter the amount. No more than two decimal places.
- After a moment, the app shows the calculation:
- “Fee” — how much the service charges for preparing network resources;
- “Total debited” — the transfer amount plus the fee. This is exactly how much will leave your balance.
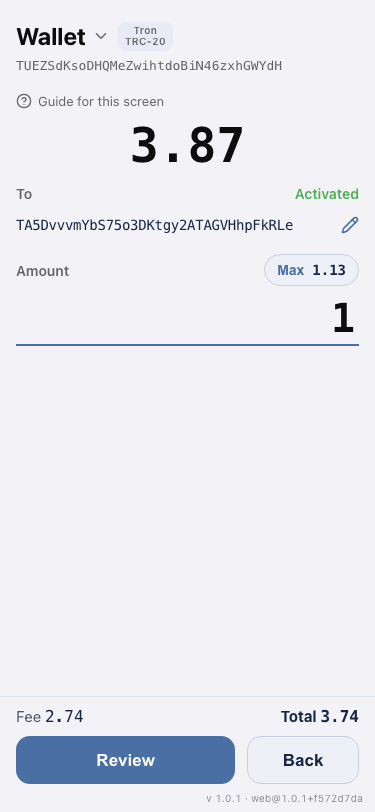
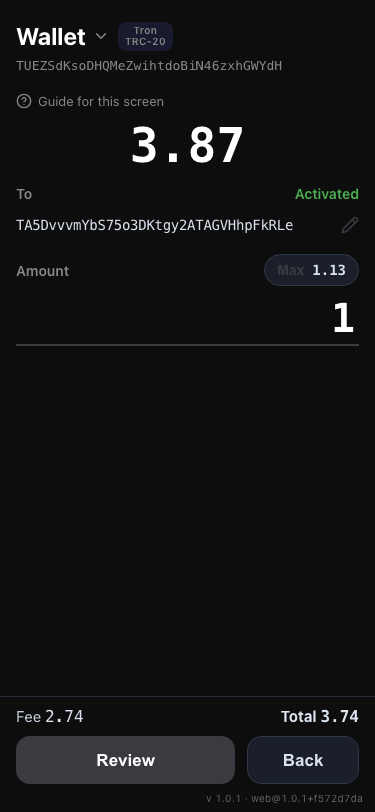
- If your wallet has not been used yet, the fee includes a one-time account activation, and the app says “Includes one-time account activation …”. The fee shown is the fee that will be charged.
- Tap “Review”. The “Confirm” screen opens: recipient, amount, fee, total.
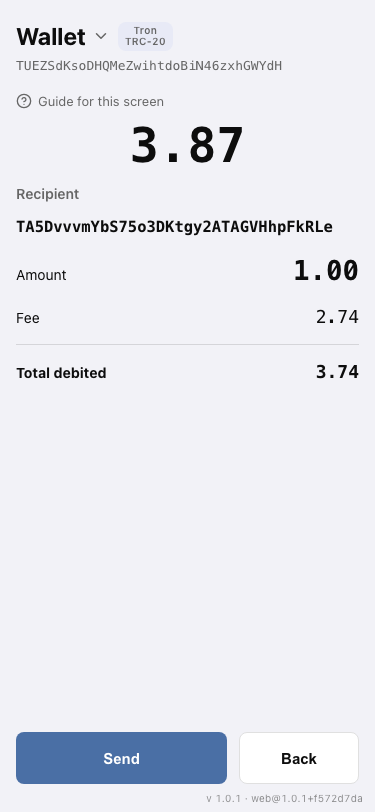
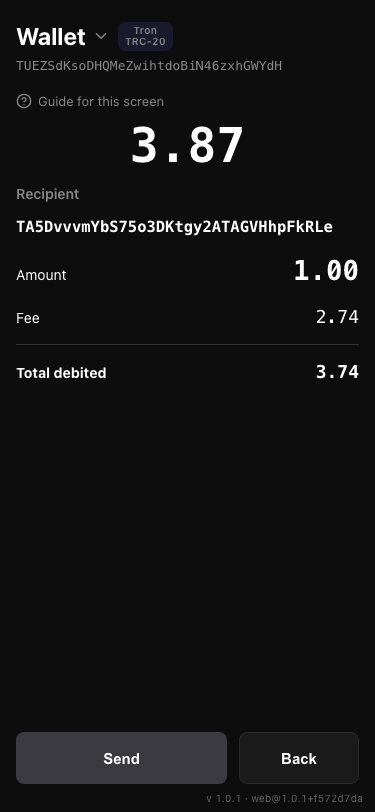
- Check the address and the amounts. If everything is correct, tap “Send”. If not, tap “Back”.
- Then you wait. Don’t close the page until “Sent” appears. Tap “Done” to return to the main screen.
Your balance must cover both the amount and the fee. You can’t send the whole balance as the amount: the fee is added on top. If it does not fit, the app says “Not enough USDT. Max …” and offers “Max …” — the largest amount that fits next to the fee.
The app always shows the exact fee before you confirm. It may be different if the recipient needs additional resources (see section 9.3).
6.2 What you see after confirming #
The app shows the steps in order. The “Show steps” button expands the full list. The steps may be as follows (the set depends on the particular transfer):
| Step on screen | What it means |
|---|---|
| Fee calculation | The app has received the final price. |
| Signing fee | The wallet on your device signs the fee transfer. |
| Signing transfer | The wallet signs the main transfer. |
| Wallet activation | Needed only if the address hasn’t been used on the network yet (see section 9.3). |
| Preparing network resources | We provide network resources for you. |
| Sending fee | The fee is sent as a separate small USDT transfer. |
| Sending transfer | The main transfer is sent to the network. |
| Transfer included in block | The network has accepted the transfer. |
| Confirmation | The network has finally confirmed the transfer. |
If “Session expired. Lock and unlock your wallet to continue.” appears, tap the gear → “Lock application”, then unlock the wallet and start again.
Success. “Sent” and “Tx hash” appear — the long transfer number. Tapping it opens the transfer in Tronscan (a public view of the network). There is a copy button next to it. The transfer also appears in the history and in the “Recent” block.
How long to wait. The money usually reaches the recipient 15–20 seconds after confirmation; the network’s final confirmation arrives in about a minute. If the confirmation takes longer, the screen shows “Send still in progress” with a “Continue tracking” button: tap it to wait for the result, or tap “Done” and come back later. If you closed the page during sending, open “Send” again: the app will find the unfinished transfer and continue. This works in the same browser.
6.3 If something goes wrong #
You need to know when the fee is deducted. The order is this: first the wallet signs everything, then we prepare the resources, then the fee is sent, and only then the main transfer. This means if an error happens before the “Sending fee” step, the fee has not been deducted. You can see this in the list of steps.
The error screen always shows what state the transfer is in and offers the available action: “Try Again”, “Sign transfer again”, or “Continue transfer”. If the error screen shows an operation number, save it.
| What’s on the screen | What happened | What to do |
|---|---|---|
| “Unable to send” + “Could not prepare the transfer. Please try again.” (or other text) | An error before sending to the network. | Tap “Try Again”. |
| “Fee updated: … → …” | The calculation expired before sending began, so the price was recalculated. Nothing has been signed or deducted. | Check the new fee and tap “Send” again. |
| “Not enough USDT” | The amount plus the fee is more than your balance. Nothing has been signed or deducted. | Tap “Send max (…)” to go back with the largest amount that fits, or “Back”. |
| “Confirm the transfer again” | The fee has already been paid, but the main transfer did not go through in time. | Tap “Sign transfer again”. The new fee is not deducted. |
| “Transfer not completed” | The transfer was not completed. The fee that was paid is on record. | Tap “Continue transfer”: the fee already paid is used, no new one is taken. If it says “Not available yet. Try again in a few minutes.”, wait and try again. Save the operation number from the screen. |
| “Transaction Failed” (“The transfer was broadcast, but the chain marked it as failed.”) | The network rejected the transfer. | Tap “View on Tronscan” to see the details. Check your balance and history: the fee that was paid is visible there as a separate line labeled “Fee”. Then “Try Again”. |
| “Confirmation Timeout” | The transfer was sent, but the result could not be determined in time. | Open “View on Tronscan” and check the status there. Don’t send again until you are sure the first transfer did not go through (check the history). |
| “Finish the transfer on your other device” | A transfer from this wallet is still in progress, for example one started in another tab or on another device. Transfers from one wallet go one after another; other wallets are not affected. | Wait until the first one shows “Sent”, usually one to two minutes, then send the next. |
| “We’re checking your previous resource order. This send will retry automatically.” | We are still processing the previous order. | Do nothing, just wait. |
6.4 Repeat a transfer #
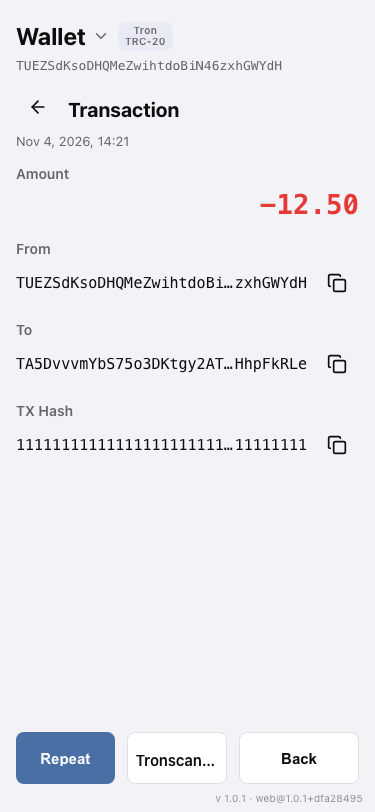
In the history, open the outgoing transfer you need (the “Transaction” screen) and tap “Repeat”. The “Send USDT” form opens with the address and amount already filled in. After that, it’s as in section 6.1, and the fee is calculated again. There is no “Repeat” button on incoming transfers or on lines labeled “Fee”.
Don’t confuse them: on the “Balance” and “History” screens, the “Retry” button, shown on a loading error, means “load again”, not “repeat the transfer”.
7. History and operation details #
- On the main screen, tap “History”.
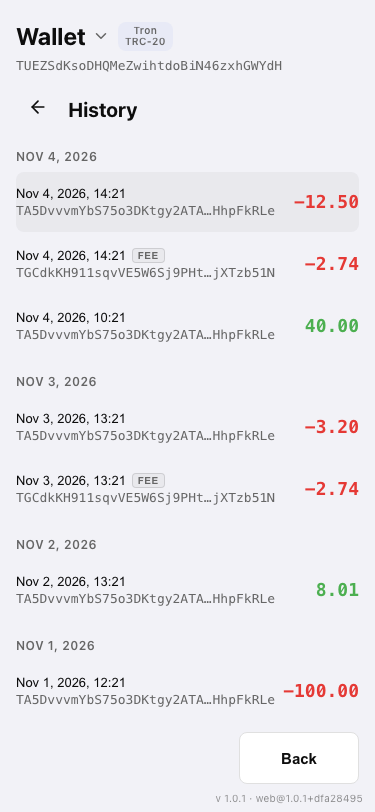
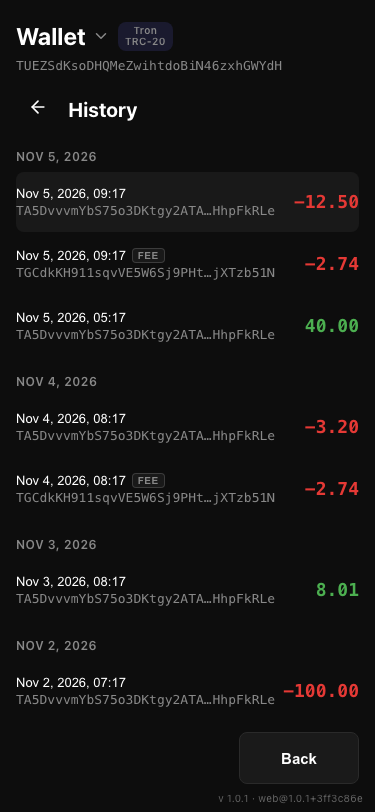
- Operations go from top to bottom by day. Each line shows: date and time, the other party’s address, the amount. Sent amounts are red, with a “−” sign; received ones are green.
- Scroll down — earlier ones load. At the bottom: “All transactions loaded”.
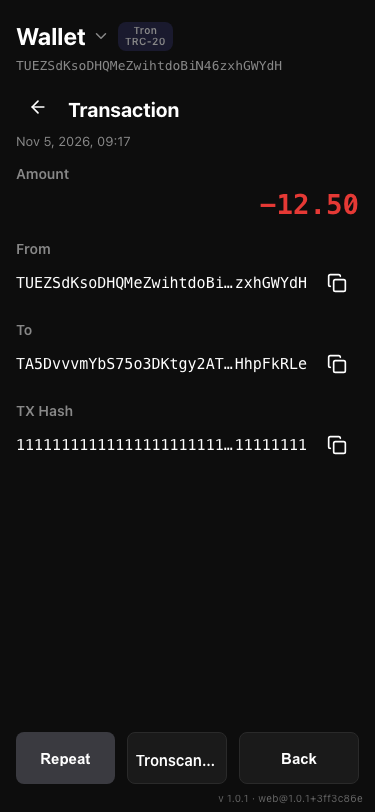
- Tap a line and the “Transaction” screen opens: date, “Amount”, “From”, “To”, “TX Hash”. Next to the addresses and the hash there are copy buttons. The Tronscan button opens the transfer in the network’s public viewer.
“Fee” lines. For one transfer of yours, the history usually has two entries: the main transfer to the recipient and a separate one — for paying for the service. The second is marked with the “Fee” label, and on the “Transaction” screen it has no “Repeat” button.
A transfer you just sent appears in the “Recent” block immediately, without waiting for the network to add it to the history.
If you open that just-sent transfer before it reaches the history, the “Transaction” screen shows it with the “Processing” label: amount, recipient, fee and the hash with the Tronscan button. The screen updates by itself when the transfer appears in the history. If that takes more than a few minutes, it says it is still processing and suggests checking it on Tronscan. “Transaction not found” appears only when neither the history nor the network knows the number; if the check itself fails (for example, no connection), the screen says so and offers “Retry”.
7.1 Export a statement for accounting #
You can save the history of one wallet for a chosen period as a file and open it in a spreadsheet or import it into your accounting.
- On the main screen, tap “History”, then “Export”. The “Export statement” sheet opens.
- In “Period”, choose “This month”, “Last month” (selected by default), or “Custom”. For a custom period, set the “From” and “To” dates; both days are included. If the start is after the end, the app asks you to check the dates.
- In “Format”, choose “CSV”, “Excel (XLSX)”, or “PDF”.
- Tap “Export”. CSV and XLSX are downloaded as a file named
statement_<address>_<month>(or with the dates of your period). For PDF, the “Statement” page opens instead. - For PDF, tap “Save as PDF” and save the page as PDF in the print window of your browser.
What is inside. The statement covers only the active wallet and the USDT transfers of the chosen period, oldest first. Each line is one operation with a type: Received, Sent, Service fee (the payment for the service, see above), or Self-transfer (to your own address; it moves nothing, so its amount cells are empty). Amounts are exact, with six decimal places.
- CSV columns: Date (UTC), Date (local), Type, Debit USDT, Credit USDT, Counterparty, Tx hash, Explorer URL, Status. Debit is money out (Sent and Service fee), Credit is money in (Received); both are positive numbers. The column names and types are always in English.
- The CSV separator and decimal mark follow your browser’s language: with a decimal comma the separator is “;”, otherwise it is “,” and the decimal mark is a dot. If amounts or dates open as text, use “Excel (XLSX)”: it needs no import settings.
- XLSX has the same columns with real dates and numbers, plus a second sheet “Summary” with the totals.
- PDF shows the wallet name, address, network, currency, period and generation time, a summary (received, sent in total, of which service fees, number of self-transfers) and a table of operations.
If the app says “Could not get the full history for this period. Try again or choose a shorter period.”, no file is created: try again or choose a shorter period. Closing the sheet or switching the wallet while it is preparing cancels the export. The statement is generated in your wallet and is not a bank document.
8. Language, theme, guide #
The gear in the top right corner of the main screen → “Settings”.
- “Language”: “System”, English, Русский, Українська, Tiếng Việt, Português (Brasil), Türkçe, Español (Latinoamérica), 简体中文, 繁體中文. “System” is selected by default: the language is taken from your browser’s language; if it isn’t supported, English is used.
- “Appearance”: “System”, “Light”, “Dark”. By default the theme follows your device setting.
- Your choice is remembered in this browser.
- “Add to Home Screen” opens the browser’s install prompt or shows steps for your device. On iOS, the Home Screen app has separate storage. Keep your recovery phrase safe before installing and import it in the installed app to open the same wallet.
- “User guide” opens this guide in the interface language in a new tab.
- In the “App” section you can see the version. If there is a new one, a “Reload to update” button appears; a “New version available” bar and an “Update” button may also show at the top of the screen.
8.1 Telegram notifications #
The wallet can send you a Telegram message when USDT arrives at a wallet or leaves it.
Connect the bot.
- Open Settings → the “Telegram notifications” card.
- Switch on “Connect this device”. Telegram opens with our bot: tap Start there. If Telegram did not open, tap “Open Telegram”.
- Return to the wallet. Settings shows the connected chat. Notifications are turned on for all wallets on this device, both incoming and outgoing.
Choose notifications for each wallet.
- Open “Wallets” and tap ⋯ on the wallet’s row, then the bell.
- In the “Notifications” window, switch “Incoming” and “Outgoing” on or off. Turning off outgoing also turns off “not you?” alerts about unexpected outgoing transfers.
The bell mark. In the wallet list, a bell next to ⋯ means notifications are on for that wallet. A crossed-out bell means Telegram is connected, but this wallet has no notifications.
Stop notifications. Switch off “Connect this device” in Settings, or send /stop to the bot.
Delete a wallet with notifications. When you delete a wallet with active notifications (see 2.3), “Turn off Telegram notifications for this address” is checked by default. Uncheck it to keep notifications. If turning them off fails, the wallet is still removed: send /stop to the bot.
8.2 Telegram invoices #
In a private chat with the bot, tap “Create an invoice”. Enter the amount, then add a description or skip it. Choose the linked receiving address or tap “Other address” (“Paste address” if none is linked) to paste and confirm a public TRON address. “Open TronMesh Wallet” opens the wallet so you can copy its public address. Review the full address before creating the link.
Without Telegram, request a payment by link right in the wallet and send it in any messenger: see 5.1.
With the @TronMeshPay_bot bot you can ask for USDT right in a Telegram chat: you send a card with an amount, and the payer opens a payment page. The money goes straight to your own TRON address: the bot never holds funds, never signs anything and never asks for your seed phrase or private key. It works separately from the notifications in 8.1.
Link your receiving address (once).
- In a private chat with the bot, send
/bindand your public TRON address (it starts with T), for example/bind ADDRESS. - The bot repeats the address and shows “Confirm address”. Tap it within 10 minutes. Telegram does not check who owns the address, so confirm only an address you control.
Create an invoice.
- In any chat, type the bot name, then the amount and an optional description. For example:
@TronMeshPay_bot 25 dinner. The wordinvoiceis optional. The amount must be above zero, with at most 2 decimal places: with more, the bot creates no invoice and shows the hint “Max 2 decimals, e.g. 12.50”; the description is up to 80 characters. To share your address without an amount, type@TronMeshPay_bot address. If you have not linked an address yet, the bot offers “Link a receiving address”. - Choose the result “25 USDT · TRON” and send it. The chat shows a card with the amount, the description and the buttons “Open payment page” and “Powered by TronMesh Wallet”. Once the card is sent, the address, the amount and the description cannot be changed. The card starts with its status, for example “🕓 Payment pending · 25 USDT”.
- Only one open invoice can exist for the same address and amount. If there already is one, the bot offers “Cancel and create new” or “Keep invoice”.
What the payer sees.
- “Open payment page” opens a page with the amount (for an invoice), the network “TRON (TRC-20)”, the description, the recipient’s address, the buttons “Copy amount” and “Copy address” and a QR code of the address. The QR code holds the address only, not the amount. The page uses the language of the link or of the browser.
- The page also has the “Open TronMesh Wallet” button. While the invoice is awaiting payment, it opens the wallet’s send screen with the address and the amount already filled in. This works in a browser where TronMesh Wallet is already set up; if the browser does not see the wallet, the button opens the TronMesh Wallet landing page instead. In Telegram’s built-in browser on iPhone the page shows “Open in Safari” instead, because that browser does not see your wallets (see 2.4).
How to pay.
- From TronMesh Wallet: tap “Open TronMesh Wallet” on the page in the browser where your wallet is set up. After you unlock the wallet, the send screen opens with the recipient’s address and the invoice amount filled in. Check them and confirm as usual (see section 6): nothing is sent until you confirm. The recipient gets exactly the invoice amount; the fee is added on top. If the page is open in another browser, the button leads to the landing page instead: open “Send” in your wallet yourself and enter the address and the amount from the page.
- From any other wallet: copy the address and the amount, or scan the QR code, and send exactly that amount of USDT in the TRON network (TRC-20, mainnet).
Status. A new invoice shows “Payment pending”. The service watches confirmed incoming USDT transfers to your address. When exactly one confirmed transfer for exactly the invoice amount arrives after the invoice was published and before it expired, the status becomes “Paid” by itself: the card in the chat is updated, the payment page shows the status and a link to the transaction, and the bot sends you a private message with the transaction ID. A transfer for a different amount does not match. A card with an address only, without an amount, has no status.
If the service cannot tell which invoice a transfer belongs to (several matching transfers, several open invoices with the same address and amount, or a transfer that already paid another invoice), the status becomes “Payment found · needs review”. The bot explains the reason in a private message and lets you choose the transfer (“Use transfer”) or cancel the extra invoice (“Cancel extra invoice”). You can also open “Confirm in Telegram” on the payment page and send the bot /confirm with the invoice ID and the transaction ID; the service checks that transaction itself before marking the invoice paid.
Status marks. On the payment page the status is a coloured label: a clock for “Payment pending” and “needs review”, a green check for “Paid”, a red cross for “Cancelled” and “Expired”. The card in the chat and the bot’s messages start with a mark: 🕓 pending, ⚠️ needs review, ✅ paid, ⛔ cancelled. The bot’s message about an expired invoice starts with ⌛ (the card itself is not updated at expiry).
Cancel and expiry.
- Only the creator of an invoice can cancel it. In a private chat with the bot send
/my(“My invoices”) and tap “Cancel” next to the invoice. The card and the payment page then show “Cancelled”. A paid or expired invoice cannot be cancelled. - A card you have not sent stays a draft for 24 hours. A sent invoice is valid for 7 days from publication. After that the page shows “Expired” and no longer shows the address, the amount or the QR code, and the bot sends you a message about it. The card in the chat is not updated at expiry, and a transfer made after the deadline is not matched.
Limits. Only USDT in the TRON network (TRC-20, mainnet). Payment is tracked only for invoices with an amount.
8.3 Support in Telegram groups #
Where the assistant is enabled, reply to a message from the bot to ask a question. If Telegram delivers a message that mentions the bot, it can answer that too. The answer appears below your message in the group. Keep your recovery phrase and private keys to yourself.
9. Frequently asked questions #
9.1 Why is the fee in USDT and not in TRX? #
Because you may not have TRX, and you don’t need it. We provide the network resources for your transfer, and the fee in USDT covers them and the network fee. You see it before you confirm.
9.2 Why can the fee change between the calculation and the confirmation? #
The price of network resources changes, and a calculation is valid for a limited time. What the app does:
- The fee shown on the send screen is one number: exactly this fee will be charged. The app signs the fee payment only if it matches the number you saw to the cent.
- If the calculation expired before you tapped “Send”, the app does not continue: it shows “Fee updated: … → …” with the old and the new fee. Nothing has been signed or deducted.
- Tap “Send” again if you agree with the new fee. If not, tap “Back”.
- If the amount plus the fee is more than your balance, the app says “Not enough USDT. Max …” and offers “Max …”.
9.3 Why does a transfer cost more to a recipient “without USDT”? What does “Not activated” mean? #
If the recipient doesn’t have any USDT yet, the transfer needs more network resources, and the fee is higher. The app will show the exact fee before you confirm.
The mark next to the recipient’s address:
- “Activated” — the address has already been used on the network.
- “Not activated” — the address is new. Sending is possible. If it needs activation, a “Recipient activation” line (a fee in USDT) appears in the calculation, and “Activation included” on the confirmation screen: we activate the address and then send your USDT.
- If automatic activation is not available, the app says “Recipient needs activation” and asks you to first send a little TRX to the address. The confirm button is inactive in this case.
- If your own wallet has never been used on the network, a “Sender activation” line may appear in the calculation. This is a one-time fee in USDT, and it is already included in the total.
If the wallet already has its own network resources, the confirmation screen will show “Self-funded send” and “Paid from wallet resources”: we don’t charge for resources.
9.4 Can I send to an exchange? #
Yes, if the exchange gives you a deposit address for USDT on the TRON network (TRC-20).
- On the exchange, choose USDT and the TRON / TRC-20 network and copy the deposit address.
- Paste it into the “Recipient” field and check that the whole address matches.
- Enter the amount. The recipient gets exactly what you entered: the fee goes as a separate transfer and is not subtracted from the amount.
- Then it’s as usual (section 6.1).
The exchange decides when a deposit is credited and what the minimum deposit is. If the network is chosen wrongly, the money may not arrive.
9.5 Do I need to top up my wallet with TRX? #
No. TRX on the balance is shown in a small line under USDT, but you don’t need it to send.
When TronMesh Wallet can provide resources to create a check, a fixed USDT fee covers creation and closing. If it cannot provide them and your wallet has enough TRX, you can explicitly agree to pay the displayed maximum in TRX for creation. The only USDT fee then is the closing reserve. Review both amounts before signing.
9.6 What if I lost my phone or computer? #
The money stays on the network. Open the wallet on a new device and use “Import Wallet” with your seed phrase (section 2.2). Without the phrase, access can’t be restored.
9.7 What should I do if a transfer ended with an error? #
Read the error screen: it shows the state of the transfer and the actions you can take (see section 6.3). If the screen shows an operation number, save it. Don’t send the same transfer again until you have checked the history.
9.8 How do I request USDT in a Telegram chat? #
After linking your receiving address, type @TronMeshPay_bot 10.50 coffee in a chat and select the payment card. The amount can have up to two decimal places. If the bot cannot read the request, it shows an example. See section 8.2.
9.9 What if the device key becomes unavailable in the Nile Telegram Mini App? #
Settings can clear inaccessible local pending-send and saved-check records only when Telegram confirms the device key is missing and cannot be restored. Check History before sending again. Clearing the records loses unshared check links and does not cancel anything on the network.
9.10 Who pays the fee on an invoice? #
The payer covers the transfer fee by default. Choose “I'll pay the fee” when creating a payment link or confirming the invoice in the private Telegram bot. With TronMesh Wallet, the payer’s total debit equals the invoice amount and the recipient receives that amount minus the quoted fee. Other TRON wallets should send the full invoice amount.
9.11 Do I need a password? #
Yes. The wallet is always protected by a password (at least 8 characters) or by biometrics where your browser supports them (see 2.1). There is no option to continue without protection. If a wallet was saved earlier without a password, the app shows the mandatory “Protect your wallet” screen after the next open or unlock (see 2.5); your wallets, funds and recovery phrase stay the same. We cannot reset a forgotten password: what remains is “Forget Wallet” and signing in again with the seed phrase (see 2.2).